

iECHO allows you to keep track of all program-related content in a single online repository, including lecture presentations (didactics), case presentations, articles, research papers, templates, videos, and other reference materials shared with participants.
Note:
Allowed file types: .jpg, .jpeg, .png, .gif, .pdf, .pptx, .mp3, .ogg, .wav, .xlsx, .docx
Maximum file size: 100 MB
Types of content in iECHO
| Agenda | A structured outline of topics and activities to be covered during the session. |
| Case Presentation | A detailed analysis or discussion of a specific case presented for peer review and learning. |
| Reading Material | Documents or resources provided for study or reference. |
| Subject Matter Expert | Documents or resources provided by invited guest speakers or topic experts. |
| Other | Additional materials not specifically covered by the other content categories. |
| Link | Web URLs pointing to external resources or relevant online materials. |
Adding Content to a Session
- From your iECHO homepage, open the left navigation panel and click All Programs.
- Select the program and participant group where you want to upload content.
- In the Schedule section, navigate to the target session.
- Click Add content.
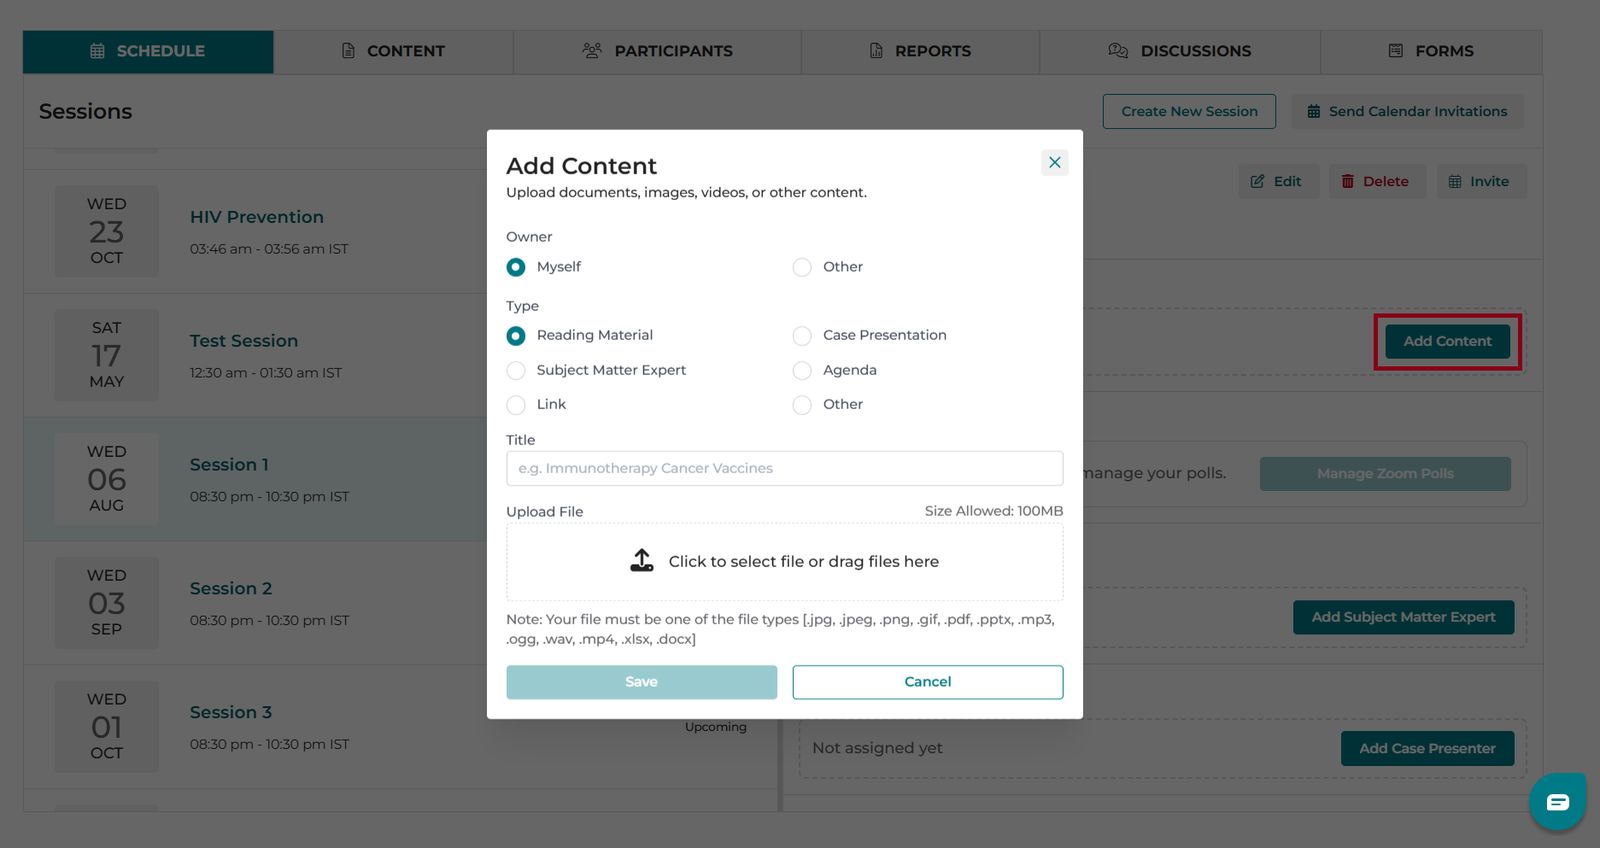
- In the pop-up window, select the Owner. Choose Myself or Others if uploading on behalf of someone else.
- Select the content type: **Agenda**, **Case Presentation**, **Reading Material**, **Subject Matter Expert**, **Link**, or **Other**.
- Enter the resource title.
- Click Click to select file or drag files here to choose your file.
- If adding a link, enter the link name in Text to display and paste the URL in Link/URL.
- Click Upload file.
Adding Content in a Participant Group
- Click Add New Content.
- Select the category: Program Resources or Session Resources.
- Complete the resource details and click Save.
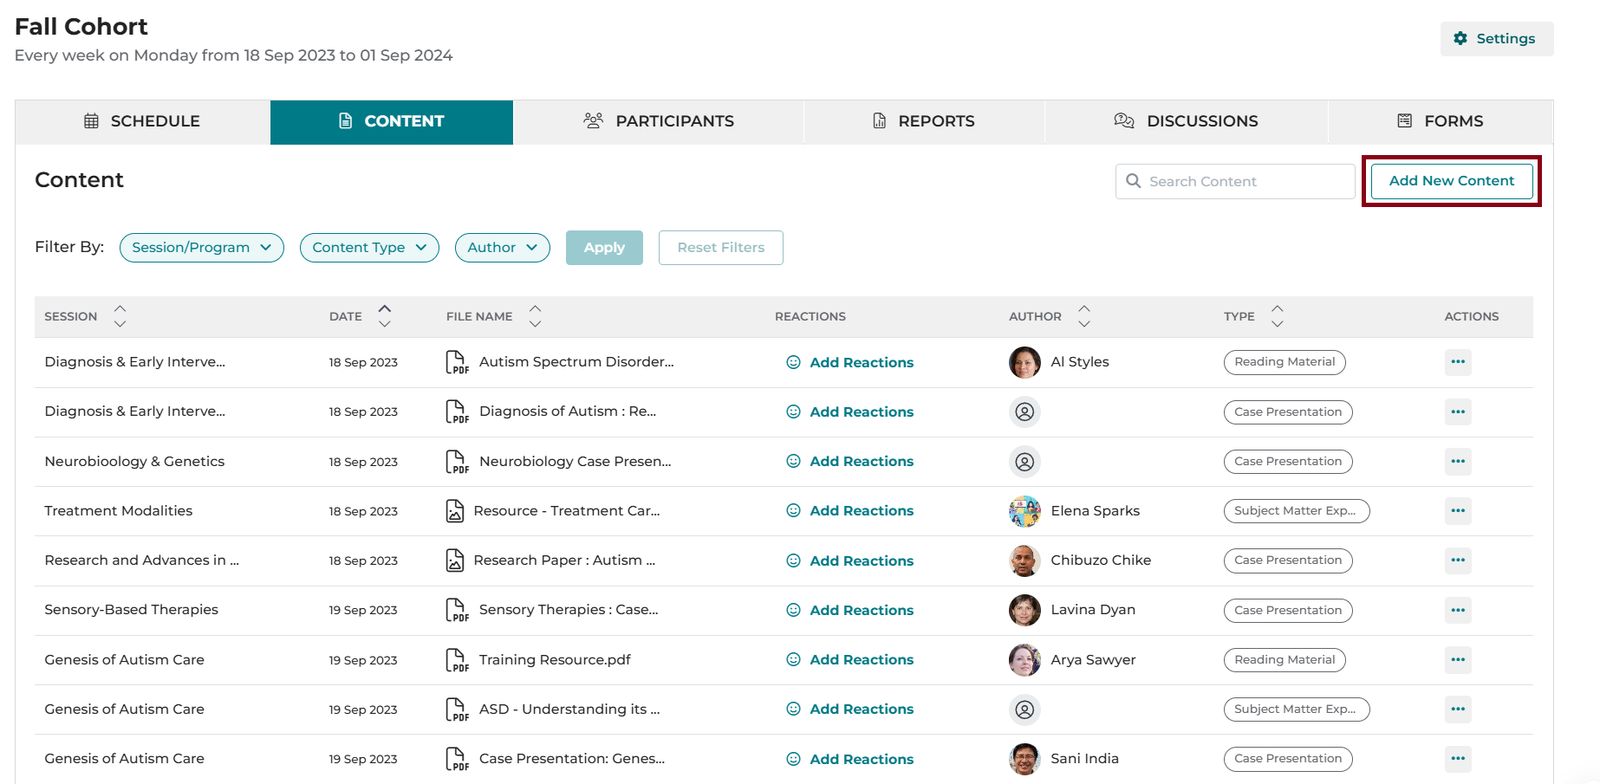
Important: Any document uploaded under Case Presentation by an admin will not be recorded as a Case Presentation in reports or program dashboards. It is recommended that the case presenter uploads the file directly to ensure accurate tracking in program analytics and CSV exports.
Publicly Shareable Content
iECHO allows you to share direct links to resources in public and private programs. Anyone with the link can view these resources without signing in to iECHO. To share content:
- Select your participant group and open the Content tab.
- Locate the item you want to share.
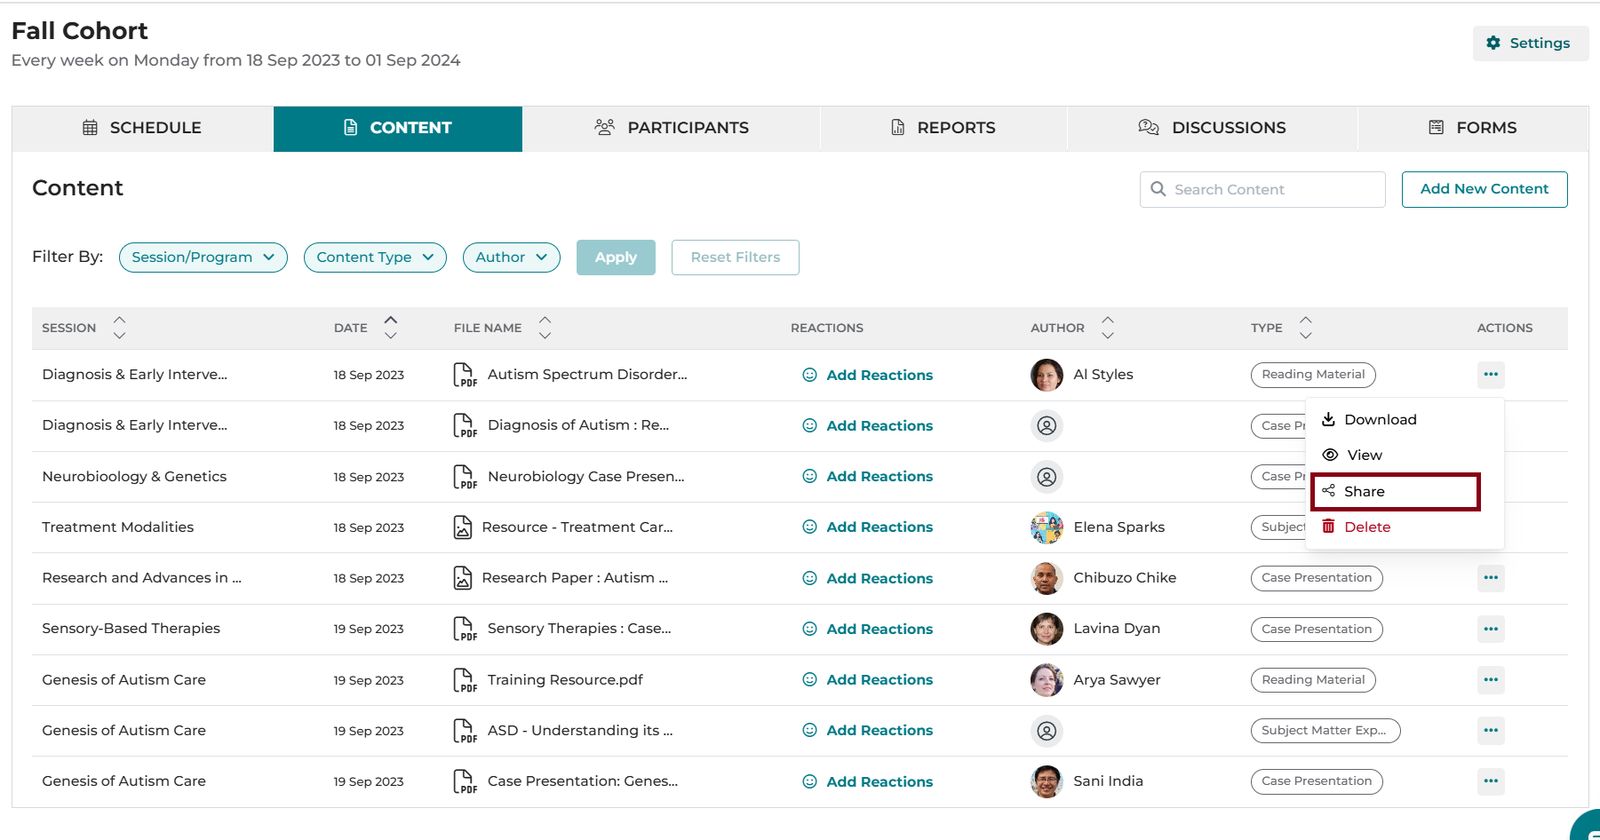
- Click the three dots icon (**...**) next to the content item.
- Click Share to copy the link to your clipboard.
- Share the link with your intended audience.
Note: Participants can also share resources publicly if the program is listed publicly.
Watch this video tutorial on uploading content in iECHO:

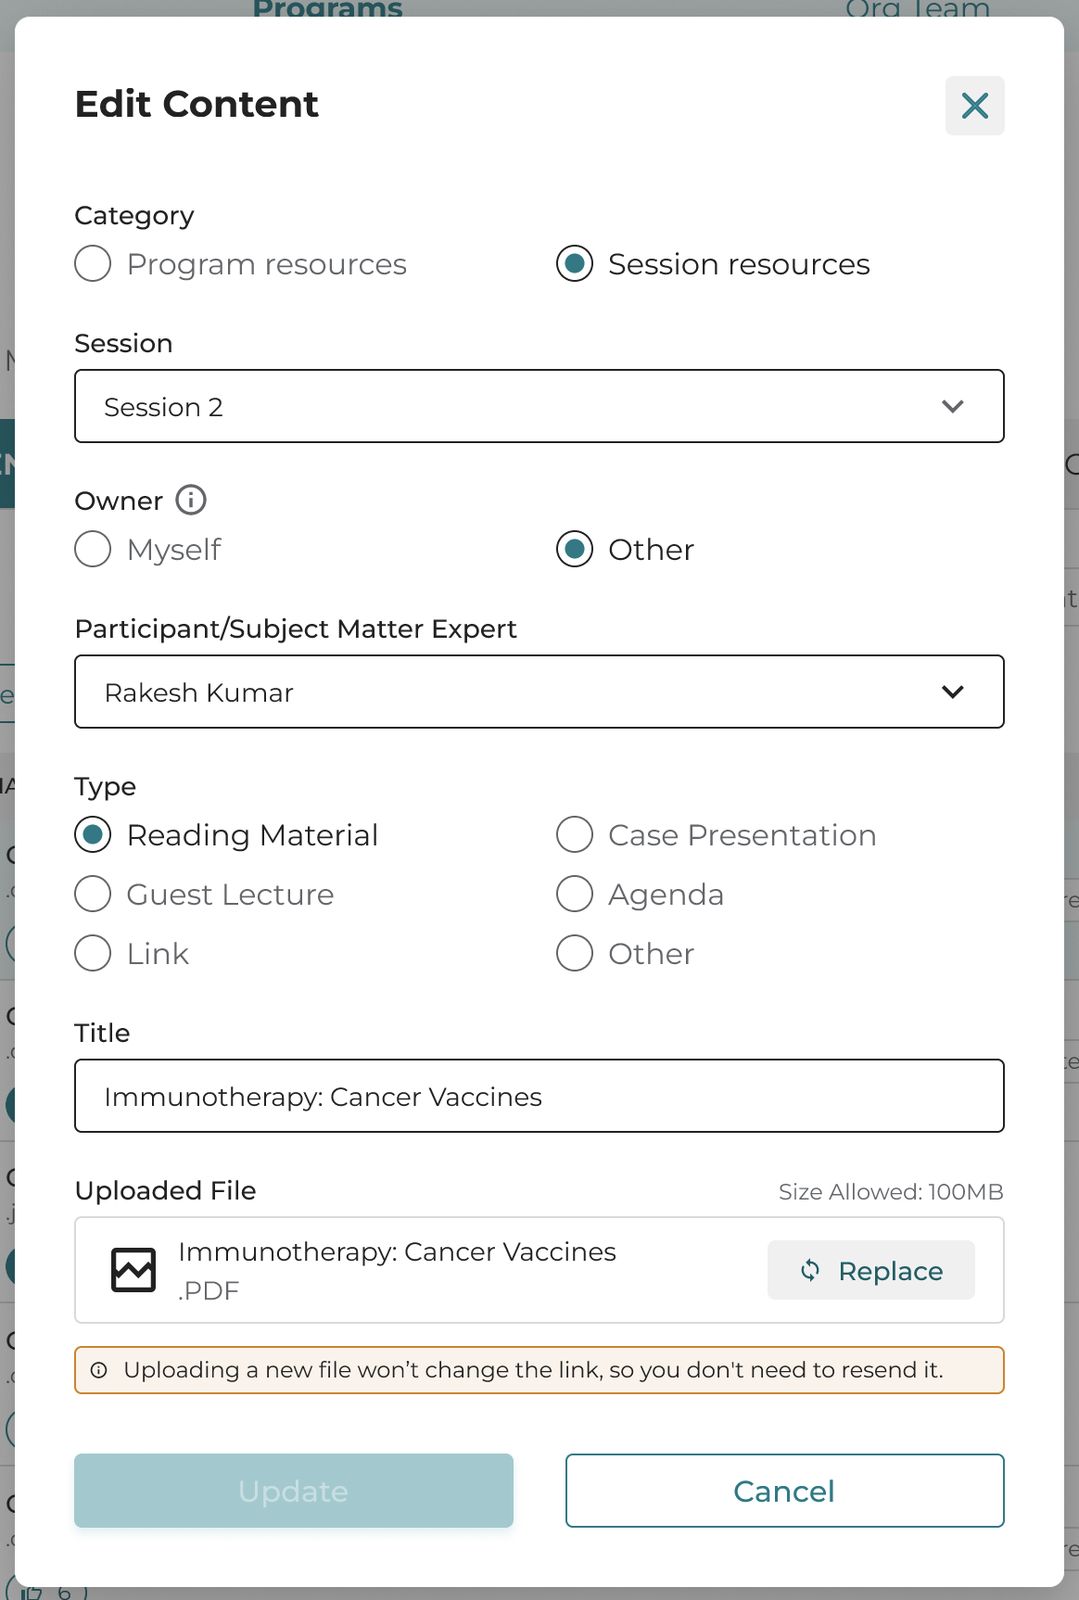
iECHO allows you to replace an existing content file without breaking or changing the original link. Participants can continue using the existing link to view the updated file.
To update or replace a content file:
- Log in to your iECHO account.
- From the left navigation panel, click All Programs and select your program.
- Select the participant group.
- Open the Content tab.
- Find the file you want to replace and click the three dots icon in the Action column.
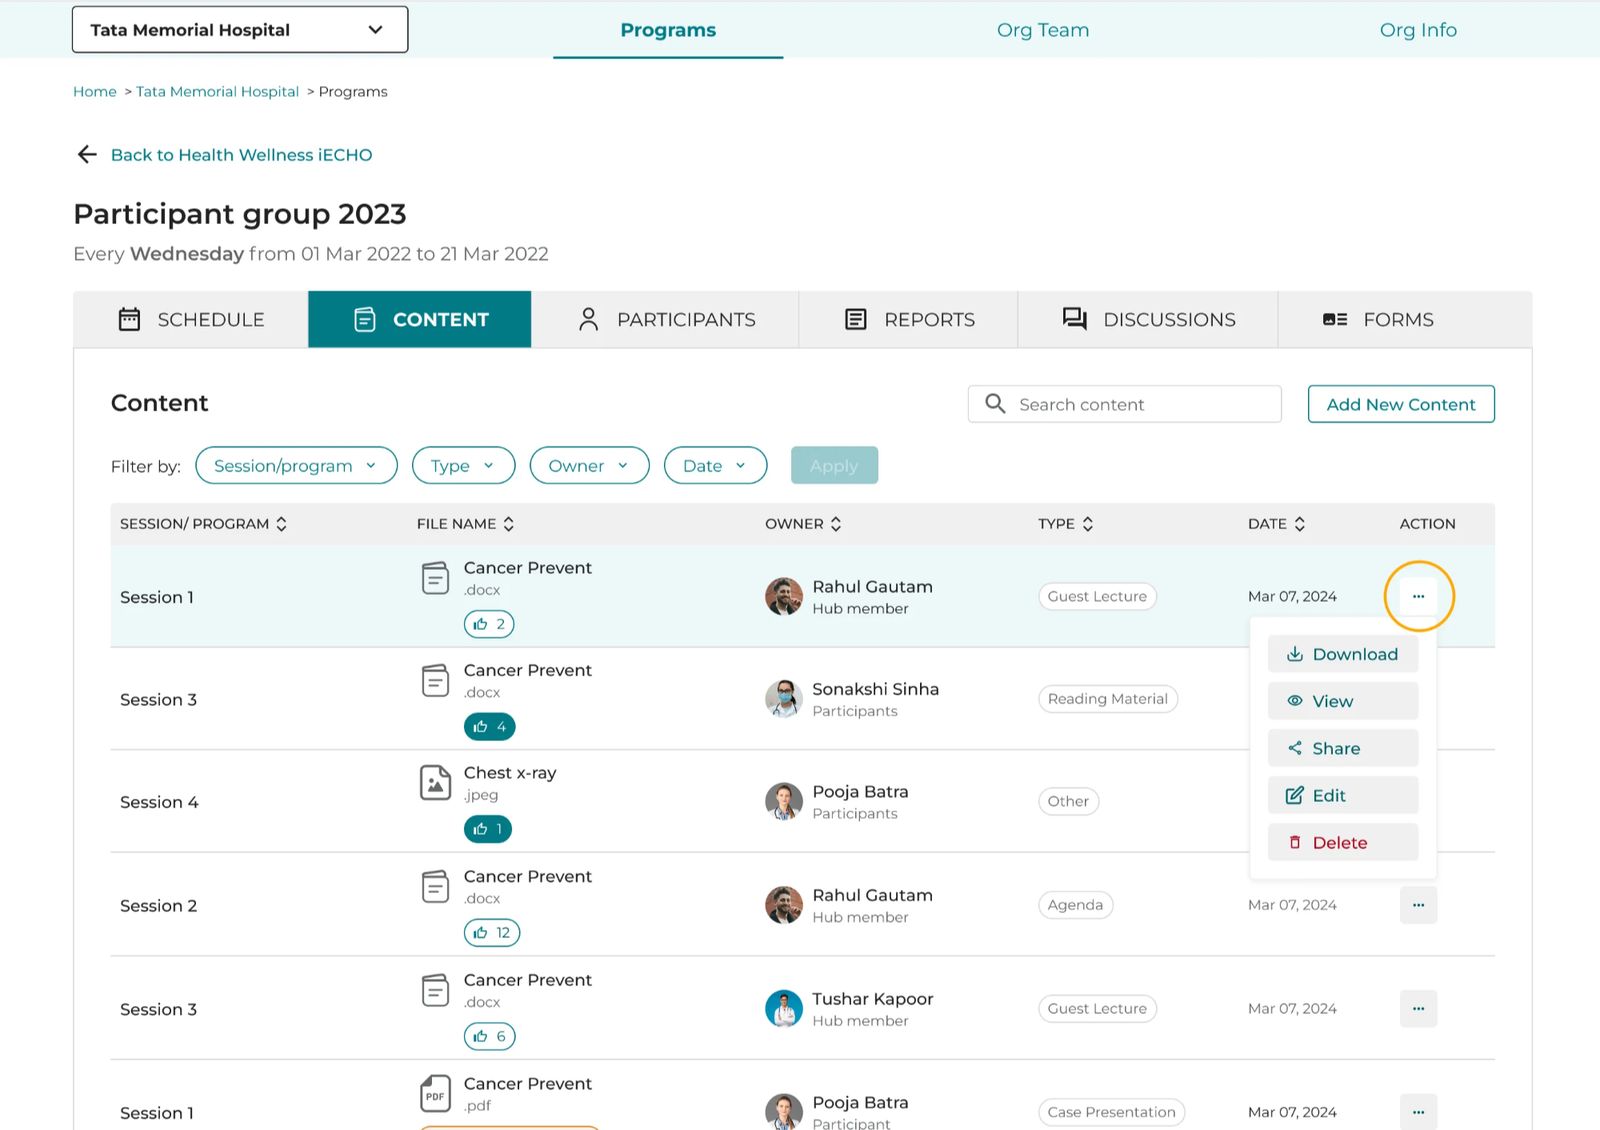
- Click Edit.
- In the Uploaded File section, click Replace and select the new file.
- Click Update to save your changes.
Focus Area Tags
Focus area tags allow users to filter content by topic within a participant group. Tags are prepopulated based on the program's focus areas. To tag content when uploading:
- Click Add New Content.
- Select the category: Program Resources or Session Resources.
- Under Owner, select Myself or Others.
- Select the content type.
- Enter the resource title.
- In the Focus Areas field, add relevant topic tags to help refine future searches.
- Click Upload file.
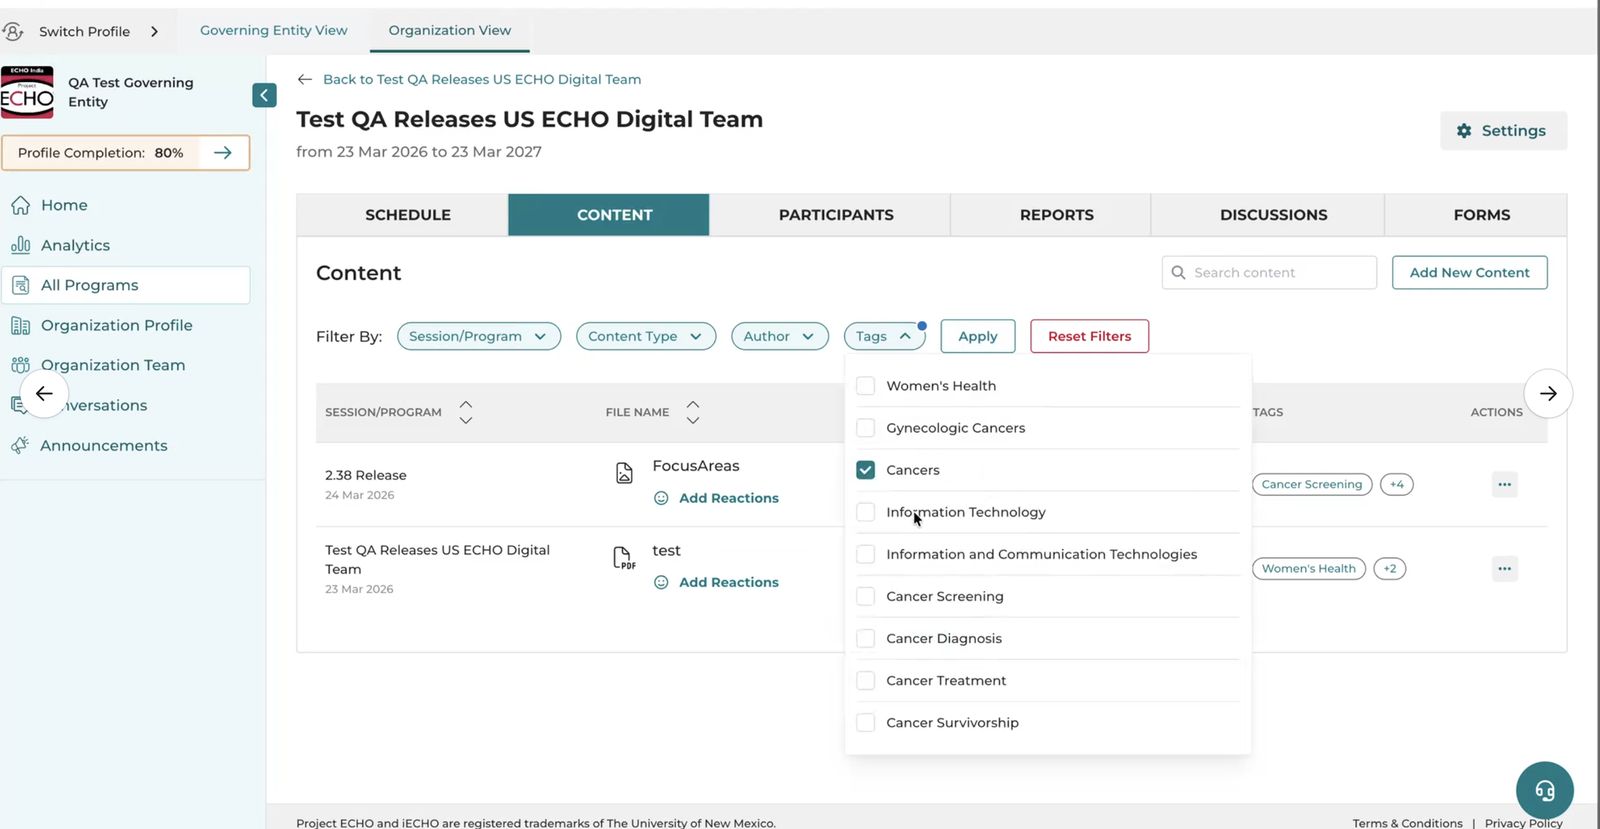
Note: Focus area tags are available for newly uploaded content. Historical content uploaded prior to this feature does not have tags assigned automatically.