
iECHO simplifies the process of creating and managing ECHO programs with an intuitive interface and customizable setup options. Its guided, step-by-step flow helps you efficiently tailor a program to your needs and integrate it into your organization's workflow.
- Creating a Program
- Selecting the right focus area
- Editing a Program
Who can create or edit a program?
Only users with the Owner or Admin role can create, manage, or edit programs in iECHO.
Creating a new program
Once your organization is onboarded as a hub, iECHO prompts you to set up your first program. You can create additional programs anytime by following the steps below.
Step-by-step: Creating a program
- Go to your iECHO homepage.
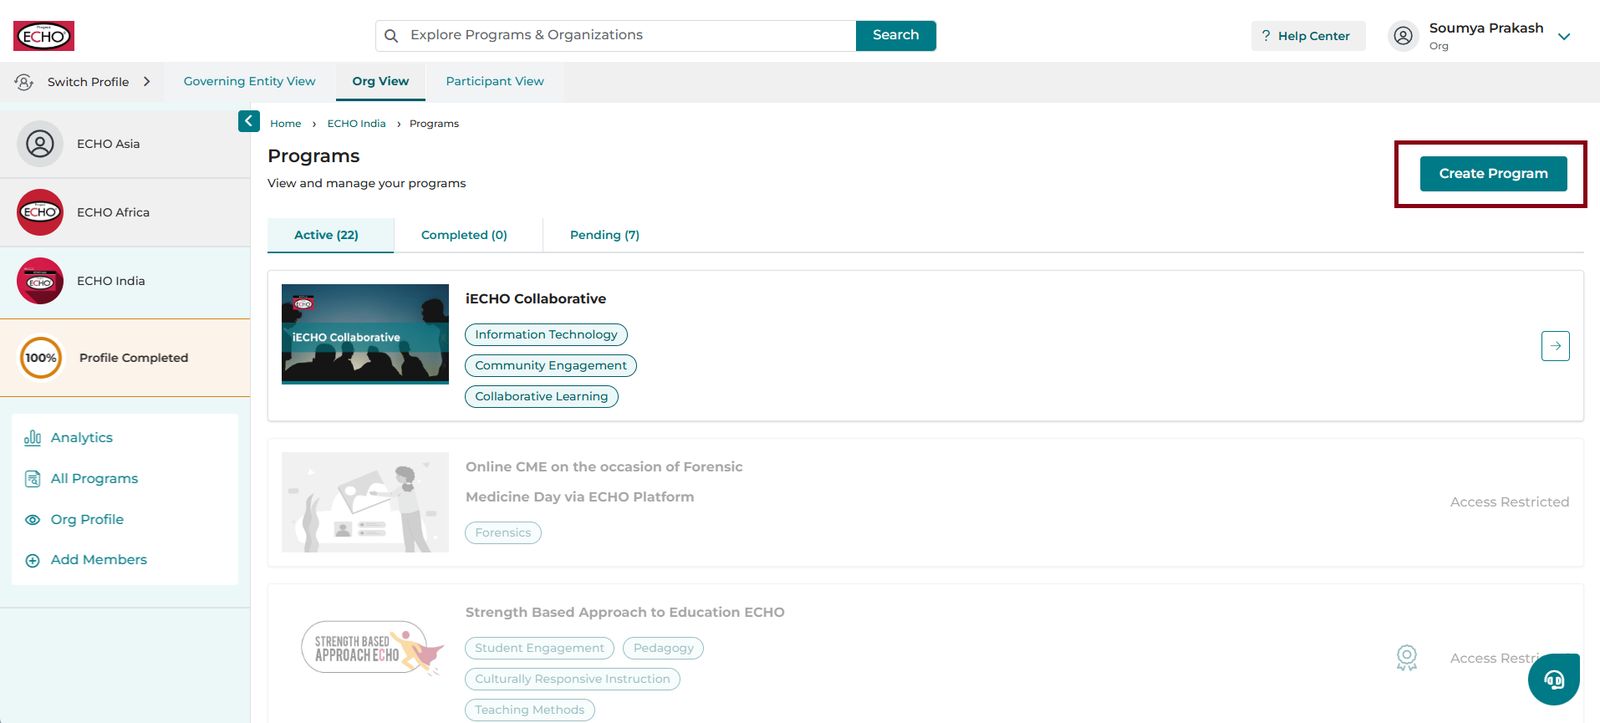
- Click All Programs on the left panel of the homepage to view and manage all programs for your organization.
- Click Create Program in the top right corner of the page.
1. Program details
- Sector: Select the sector that represents your program's domain.
Example: For a program on "Palliative Care in Cancer," choose Healthcare as the sector.
- Click Next to proceed.
2. Focus areas
Define up to five specific topics within the selected sector that your program will address.
Example Focus Areas for Healthcare > Palliative Care in Cancer:
- Palliative Care
- Breast Cancer
- Cancer Screening
- Cancer Diagnosis
- Cancer Treatment. If you are unable to find a suitable focus area from the list, select Other.
3. Target professions
Choose the professional groups your program is designed for.
Example:
- Palliative Care Nurses
- Oncologists
- Breast Surgeons
When creating a program, select Target Professionals accurately. These selections will be auto-populated for new participants during registration, helping them quickly find and select their profession.
Example: If you are starting a program on Maternal Mental Health and your target professionals are counselors, select the most relevant counselor option while setting up the program. This ensures participants see the right options when they register.
4. Target location
Choose the locations in which the program is offered. There are three options:
| Global | Open to participants worldwide. |
| Country-specific | Open to one or more countries; specify the countries. |
| State/province-specific | Open to one or more states or provinces; specify the country and then the state/province. |
After program creation, when the target location of your cohort is identified, use the shared template to compile a list of participant organizations and email it to support@iecho.org. iECHO updates the database in advance, making it easier for participants to find and select their institute or workplace during registration.
Example:
If a program targets specific districts in Albuquerque, use the template to list relevant hospitals, clinics, or institutions from those districts and share it during planning to ensure a smooth registration experience.
Template: Use the CSV or Excel format provided:
Template_SpokeOrganizations.xlsx
5. Program objective
Briefly describe your program's goals and strategy (maximum 100 words).
- Avoid technical jargon.
- Ensure it aligns with the ECHO Model, if applicable.
- This description is visible to participants during registration.
6. Registration and visibility
There are two types of registration for your programs.
| Private | Registration is by invitation only. The organization team sends out invites to their participants. |
| Public | Open to anyone with the registration link. The organization team can still manage access. |
You can control whether your program is searchable
| Visibility | Description |
|---|---|
| Listed | Program appears in iECHO search results |
| Unlisted | Program is hidden from search but accessible via link |
Note: If using public registration, you can control visibility:
Public program pages support Open Graph (OG) links. When a public program link is shared on Slack, WhatsApp, LinkedIn, Facebook, or Twitter, it shows a rich preview with:
- Program banner
- Program name
- Program objective
Benefits: Better visibility, quick context for learners, and improved program reach.
7. Program name
Choose a clear, descriptive name.
- iECHO will suggest names based on your inputs.
- You can also enter your own name.
The name must include the word ECHO and cannot be edited later.
Program name suggestions are automatically aligned with your selected platform language. For example, if your platform language is Spanish and you create your program in Spanish, iECHO will suggest program names in Spanish.
8. Program banner
Upload a visual banner to represent your program.
- Upload your own banner image.
- Refer to the Project ECHO Brand Guidelines for proper logo usage.
Hub and Program Naming Guidelines_April 2023.pdf
9. Topics covered (curriculum)
List the key topics that will be included in the program.
Example:
- Trauma-Informed Care
- Palliative Care in the Emergency Department
- LGBTQIA+ Care in Serious Illness
- Pediatric Palliative Care
- Neurological Disease & Caregiver Stress
- Medical Aid in Dying
- Severe Mental Illness in Palliative Contexts
10. Contact information
Add a contact email (preferably a shared team inbox) for participant queries.
11. Provides certificate
- Toggle Provides Certificate if you plan to issue certificates to participants.
- Specify your certificate issuance criteria, such as:
- Minimum 80% attendance
- Minimum 70% score in post-session assessments.
- Add Accreditation Information, if applicable. Include the name of the accrediting body.
These are specific requirements and rules a Certificate Authority (CA) must follow when issuing digital certificates. These criteria ensure the integrity and validity of the certificates, which are crucial for secure online communication and authentication.
12. Assign admins
You can assign additional team members as program admins using Assign Permissions.
Learn more about assigning permissions.
13. Assign program leads
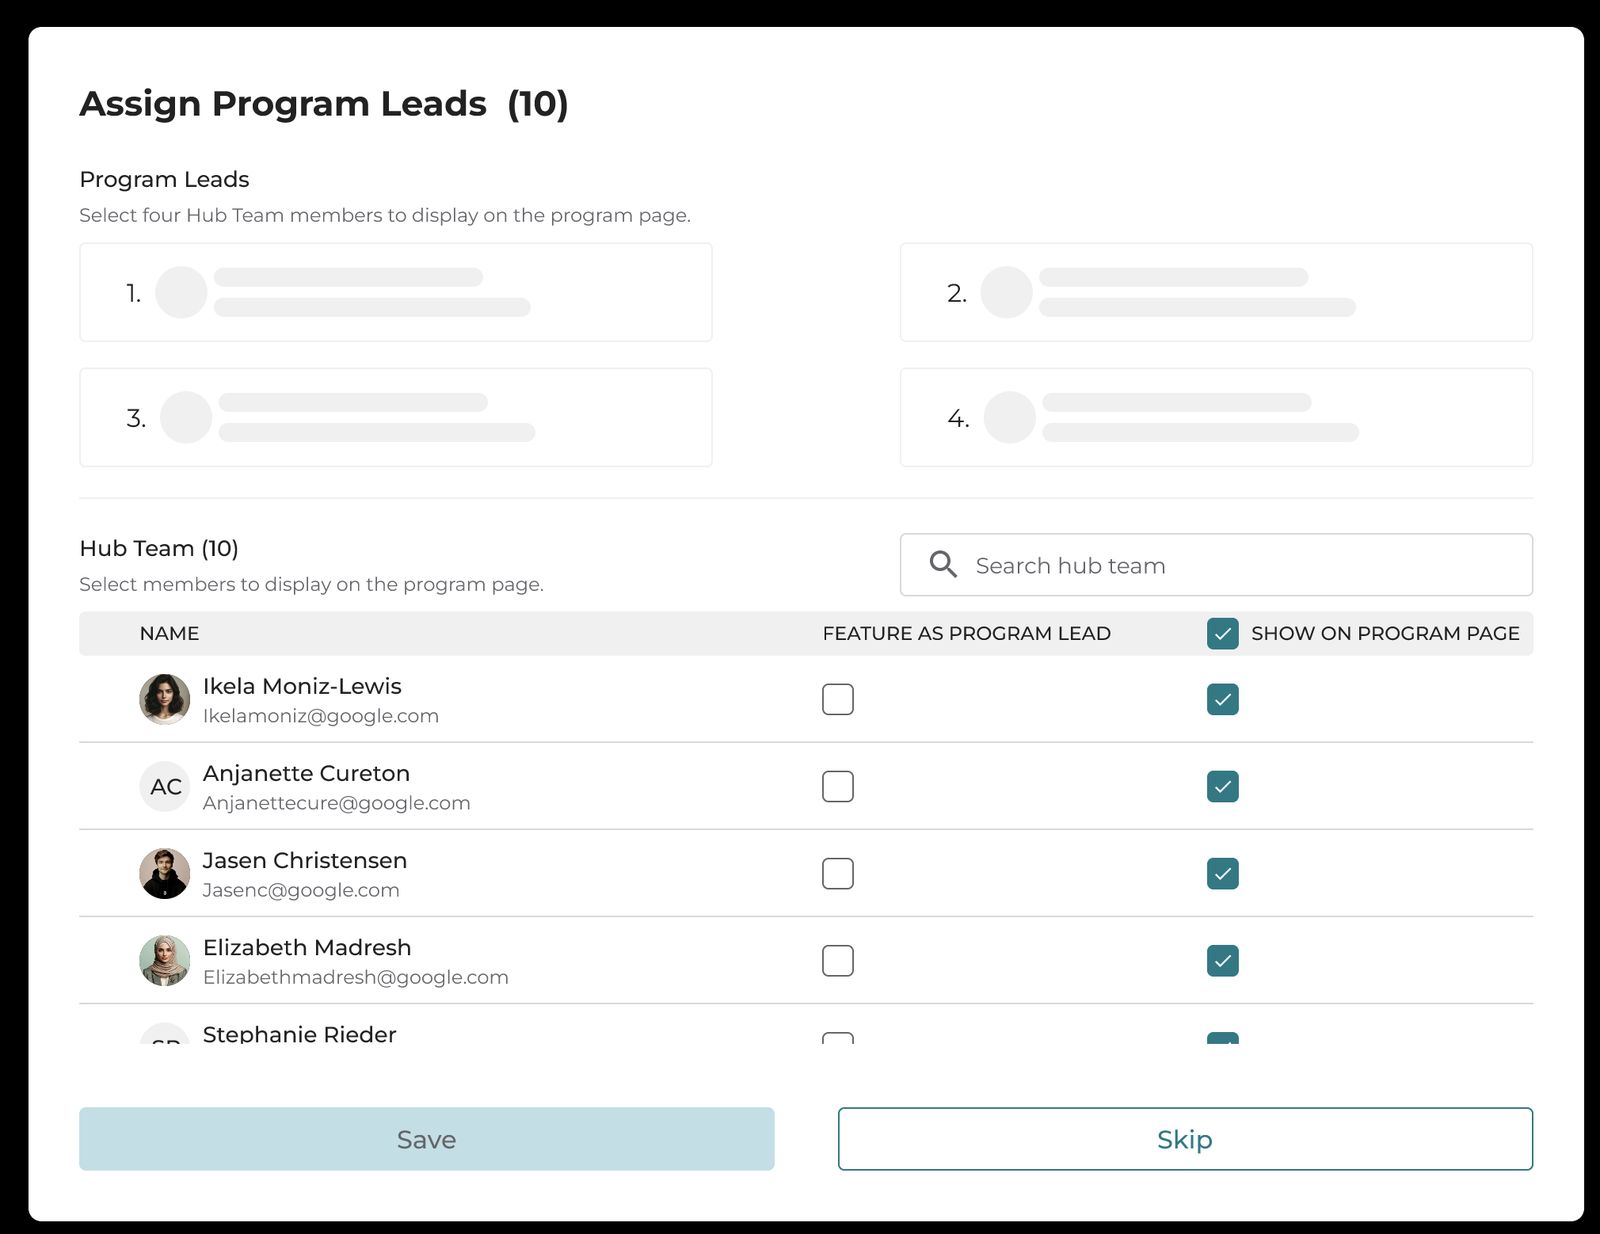
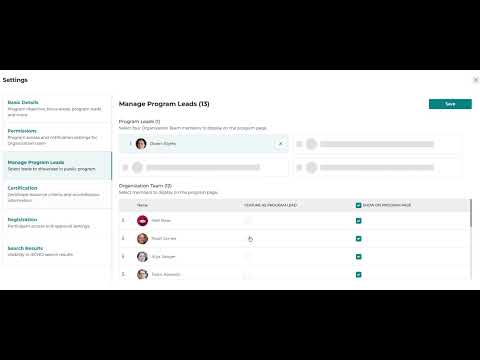
Program Leads are prominent members of your organization team who will be featured on the public program page. They are typically well-known in their fields and help attract interest and participation.
Note:
- You can assign up to 4 Program Leads.
- To assign someone as a Program Lead, ensure they are first added to your program as an admin.
- Select up to 4 program leads from the list to showcase on the program page.
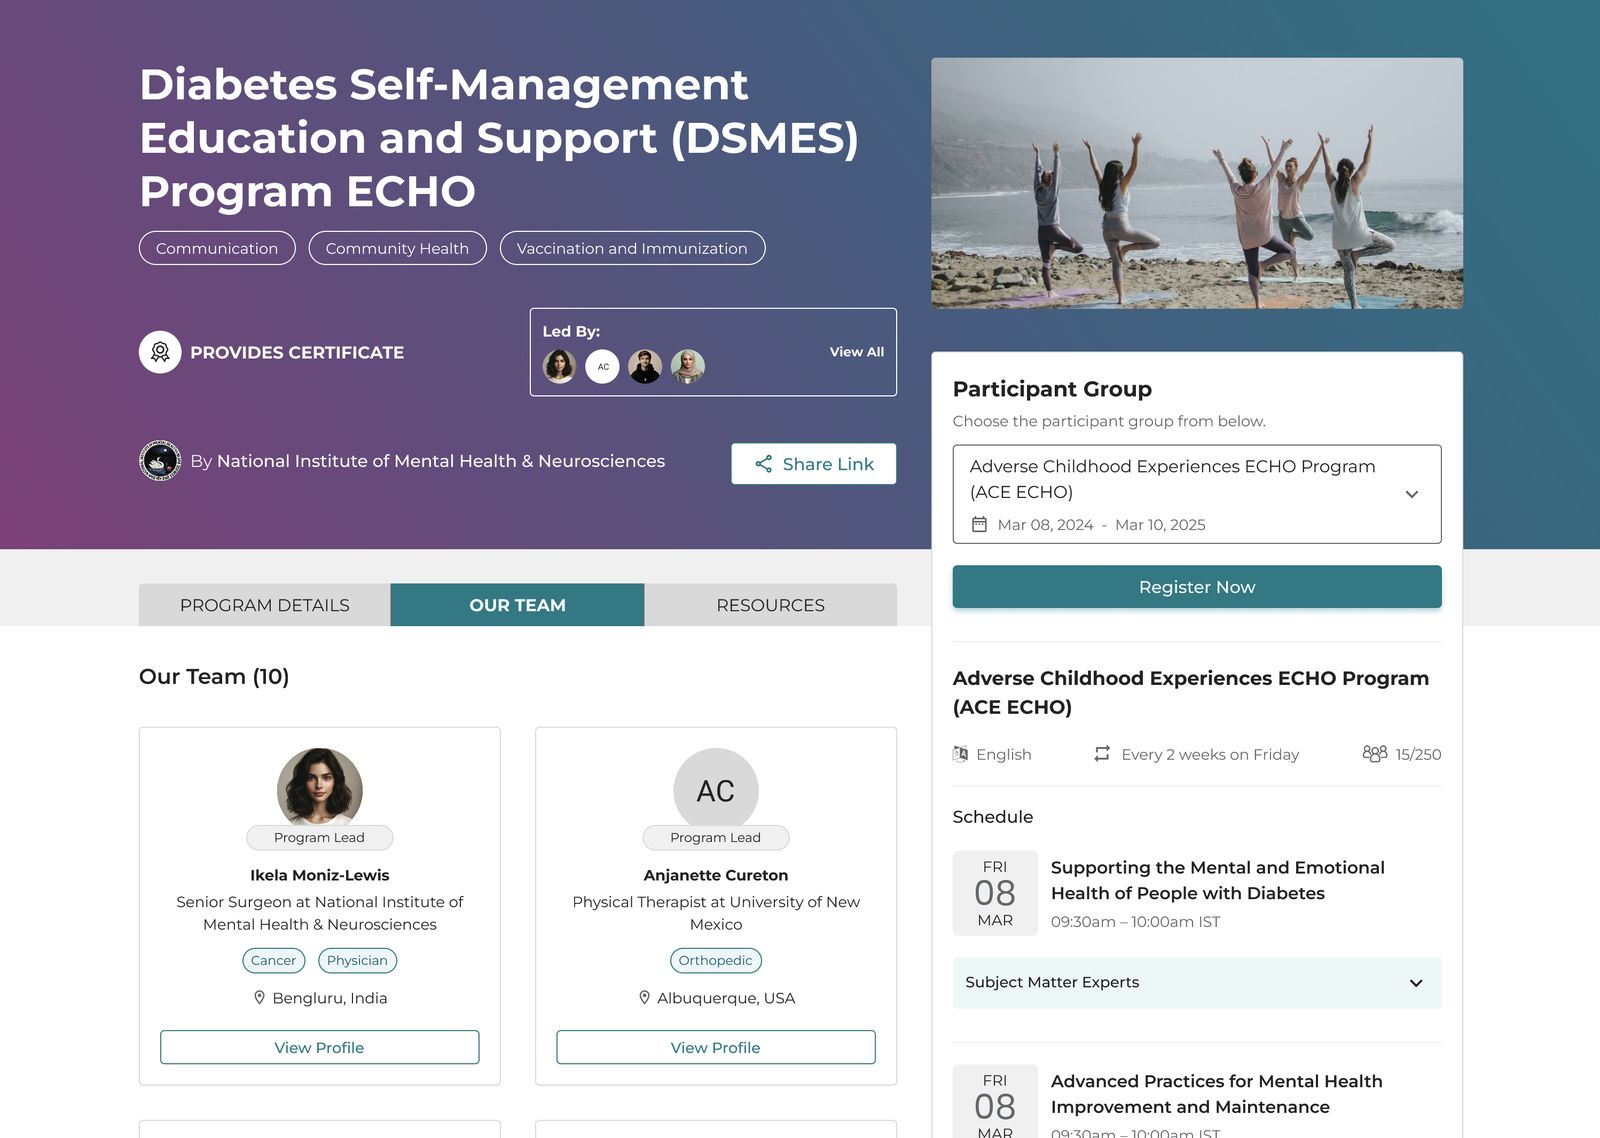
- You can either assign an admin as a program lead or feature them under the Our Team section on the public program page.
Feature as Program Lead: Highlighted directly under the program name.
Show on Program Page: Highlighted under "Our Team".
Hiding hub team members from the public program page
To hide specific hub team members from appearing on the public program page, uncheck their names in the Show on Program Page column.
Check out this video tutorial on creating program leads:
14. Create a participant group
This is the final step before launching the program.
Editing a program
Owners or Admins assigned to a program can make changes after creation.